July 27, 2021
Cleaning a Coffee Maker In 5 Easy Steps
Delicious coffee that tastes perfect every day is a wonderful thing. But in order to achieve this, a regular cleaning of your coffee maker is a must. It also makes all the difference when it comes down to what kind of machine you have. After each use, make sure you take out and wash your reusable filter (if applicable), remove any removable parts from inside the carafe for cleaning purposes and wash off anything else such as spills or drips on its surface before putting them back into place.
One of the most important and often neglected appliances in a home is a coffee maker. The care it needs varies depending on how much you use it. But if you’re going to be using your coffee maker regularly, then there are some simple steps that can help ensure a high-quality cup every time:
– Clean the pot after each use with soap and water or white vinegar – empty the grounds container daily.
When you use your coffee pot, for example when you make a cup of coffee, it leaves behind hard water stains. These build up over time and can be difficult to remove. The best way to clean this is with soap
– Clean the unit weekly by running two cycles of just water through it without any coffee beans
Did you know that coffee makers leech metals into your coffee? It can be harmful to drink all those metal particles, so make sure to clean out your coffee maker every time after using it.
– Clean out all filters monthly (inside and outside) as well as wipe down grills inside and outside of the unit with baking soda paste (or other light abrasive). This will remove any built-up deposits from oils or minerals which can affect the taste. I recommend that you clean the filters of your coffeemaker every month. For example, as liquid flows through a filter, it leaves behind chemical deposits in the form of scale. When you don’t clean those filters regularly, they can’t filter properly which would affect the coffee taste.

Why Clean a Coffee Maker
Some people still insist on brewing with tap water. Tap water can produce an unpleasant taste due to minerals and other sediments that gets stuck in the machine over time. There are also health concerns such as mold growth if you don’t clean your machine regularly! One of the most common mistakes is skipping steps like running vinegar through it periodically (and always after each use). You can extend its lifespan by descaling every six months and consistently brewing with distilled or filtered water.
One of the most germiest places in your home is actually a coffee maker! Half of the reservoirs tested by NSF International had yeast and mold, which could lead to allergic reactions or infections. Cleaning your coffee maker properly can keep you healthy while drinking that morning cup o’ joe.
Next time you’re hosting coffee-loving guests, try making your own vinegar cleaner for the pot. This is a great way to cut down on some of those harsh chemical cleaners and get that old mineral buildup off without resorting to something so toxic like bleach.
Coffee lovers are always looking out for new brew recipes or places they’ve never tried before; don’t be surprised if people ask what kind of beans or roasts you have at home! If this sounds daunting, consider getting ahead by cleaning up any leftover messes in advance with homemade vinegar cleaner using white distilled vinegar mixed with water as needed in equal parts until it’s diluted enough not to damage delicate surfaces–doing this right beforehand will save yourself a lot more trouble later.
Read also: Benefits Of Eco-Friendly Cleaning For Your Home & Planet
How to Clean a Coffee Maker
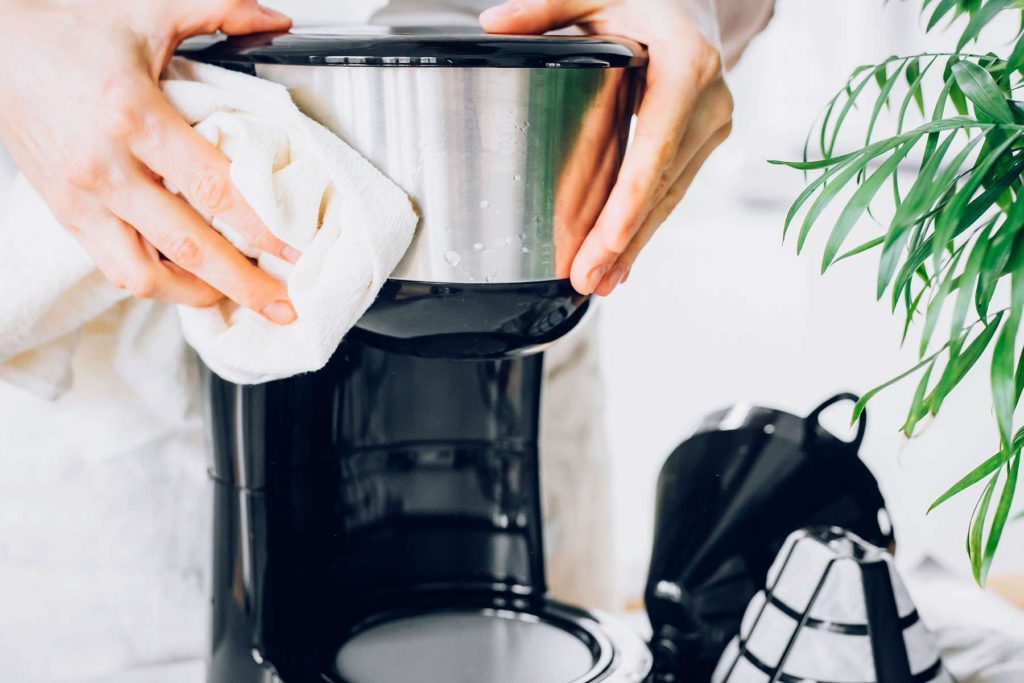
Step 1: Wash Coffee Machine Exterior
A great unknown for coffee enthusiasts is the importance of maintaining your machine. Cleaning a coffee maker before brewing will keep it running at peak performance and not have to worry about clogged machines or needing to descale every few months! The exterior of a typical coffee maker has many parts that can be washed in a dishwasher, but please do not put any reservoir lids on top rack as they may get warped. (And don’t forget – you should always wash these things with soap!)
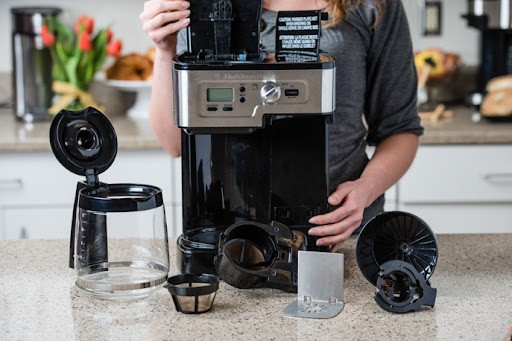
Step 2: Clean Coffee Maker Interior
Assembling your coffee machine, while easy to do by following the instructions on the box, can sometimes leave a mess. The next time you take it apart for cleaning make sure to gently brush out any stuck coffee grounds in the coffee cup with a toothbrush and remove any buildup using damp cloths. Finish this task off with some white vinegar-soaked towels that will dissolve limescale deposits (white crusty build up).
Read also: How Much to Tip House Cleaning Service
Step 3: Use a Vinegar Solution
Do you want a delicious cup of coffee in the morning to start your day off right? It’s always important that we take care of your coffee maker, and with this quick routine cleaning process, it’ll be ready for years! Make sure there is no coffee in the machine before starting. Place an empty mug on top of the tray so as not to waste any precious space inside. Empty out water from the reservoir; if you have a filter too – remove it. Refill reservoir until at maximum line. Fill it up 1:1 ratio-with distilled vinegar solution or filtered water (you may need more than what is recommended). Then turn on and select max size settings, allow time for brewing.

Step 4: Rinse the Reservoir
Let the coffee maker sit for at least 30 minutes. When time’s up, take out the reservoir and rinse it with water to get rid of any vinegar residue. You may have to do this a few times before you can finally smell that familiar aroma again!

Step 5: Clean with Water
When cleaning a coffee maker after having used vinegar, repeat step 1 but use water instead. Place an empty mug on the drip tray and pour in enough water to fill up all of the reservoirs that were previously filled with vinegar (up to the maximum line). Turn it on using the largest cup setting for 10-20 minutes or until you feel like there is no more liquid left inside. Now your coffee machine will be ready for its next day’s brew!
Read also: Cleaning Glass Shower Doors With Vinegar & Dawn
(Optional) Step 6: Special Descaling Solution
For tougher mineral buildup and better-tasting coffee, give your machine a good scrub with a descaling solution every 3-6 months.
Check out our Effective Kitchen Cleaning Checklist for additional cleaning tips around the kitchen, or contact us today to schedule a professional home cleaning in NYC.