October 29, 2020
How To Clean a Washing Machine
We’ve discussed various laundry room cleaning tips, but if you want to keep your washing machine clean and efficient, it’s important to clean it regularly.
The fact is that washing machines tend to accumulate:
- fungus and mold in the sealing which are the source of unpleasant odors;
- limescale on the heating element;
- residues of washing powder, conditioner, and other additives inside the machine;
- dirt and small things in the drain pump filter;
- dust and sand in the inlet hose.
Therefore, over time, you may notice that after washing your clothes (especially light-colored ones) have ceased to shine cleanly, as they were before. Also, external dirt that quickly covers the door and other protruding parts are spoiling the overall view of the room.
So how often do you need to clean the washing machine from scale and dirt? Optimally – once every 2-3 months. If you have a pet at home or you often wash woolen things in it, then major cleaning should be done more often. Such type of cleaning is usually included in a deep cleaning services.
From this material, you will learn how to properly clean the washing machine in the complex:
- How to clean the wash drum, and most importantly – the heating element;
- How to clean a drain filter;
- Simple steps to clean the detergent drawer;
- How to clean the inlet hose filter;
- How to remove external dirt from the hull and door. And at the end of the article, you will find some dirt prevention and care tips.
Read also: How to clean the microwave at home
Step-by-step instructions
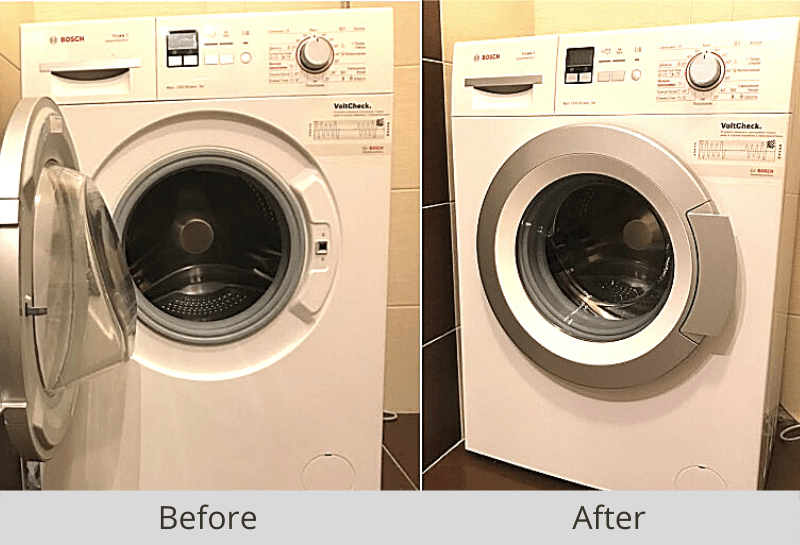
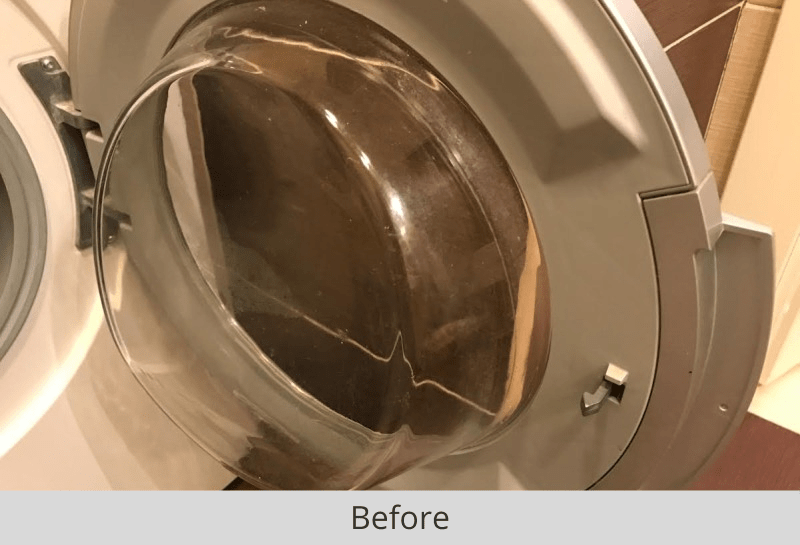
Well, shall we begin? To make the instructions clear, we decided to test the theory in practice and cleaned the client’s washing machine, and made a few photos during the process.
Step 1. Cleaning the washing drum and heating element from scale
At the first stage, we need to clean the inside of the machine, removing mineral deposits from the heating element and drum. How to remove limescale from a washing machine?

The secret of all methods is simple and basically the same:
Since the limescale consists of magnesium and calcium salts, it is necessary to clean it with organic or inorganic acids. What acids do we have in every home? That’s right, vinegar or baking soda.
Method 1. How to clean the washing machine with vinegar and baking soda
You will need:
- 2 cups of white vinegar (preferably);
- 1/4 cup of baking soda or washing soda,
- 1/4 cup of water,
- sponge with a hard side.
What to do: Mix the baking soda and water in a small bowl, add the baking soda mixture to your machine’s detergent drawer, and pour the vinegar into the drum. Run the machine idling at the highest temperature and for the max time.
Method 2. How to clean the washing machine with citric acid powder
Cleaning the washing machine with citric acid is even easier.
You will need 1-6 packs of citric power.
How much citric acid to pour depends on the size of the washing machine and how dirty it is.
What to do: Add citric acid powder to the detergent drawer. Run the machine at the maximum temperature and operating time.
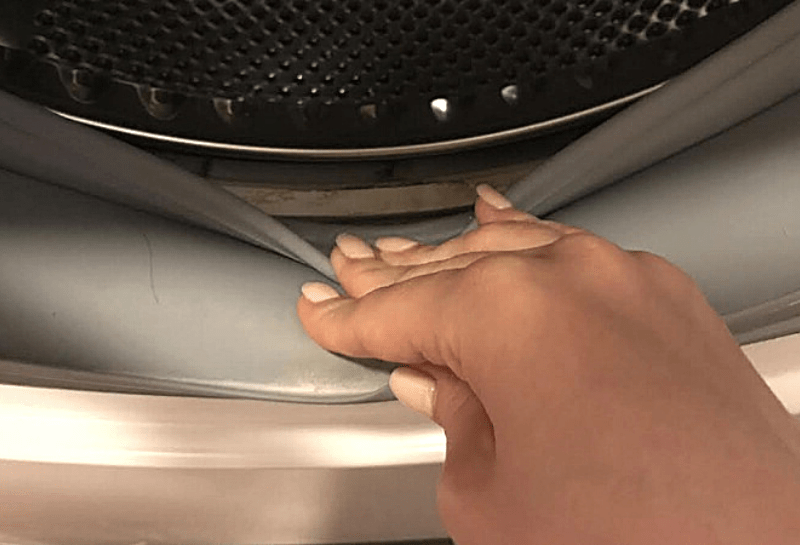
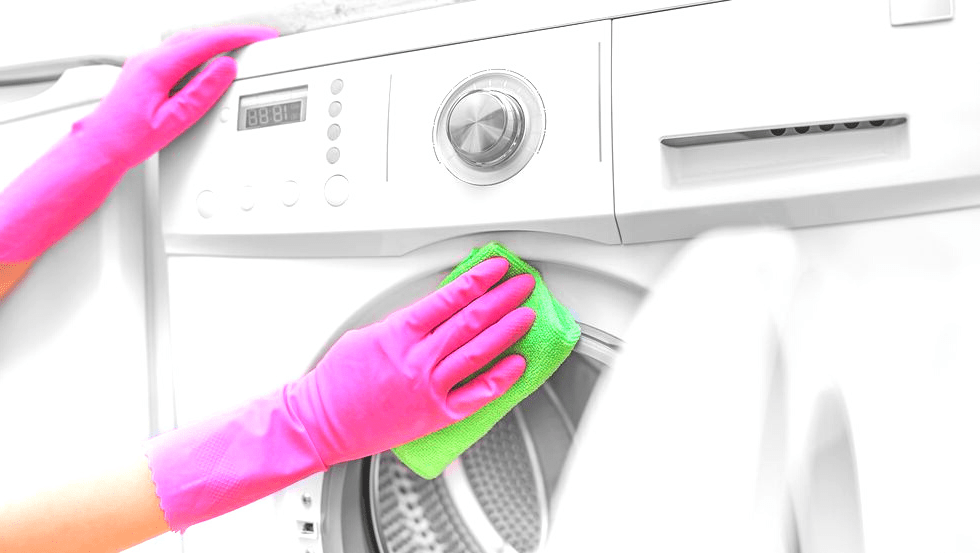
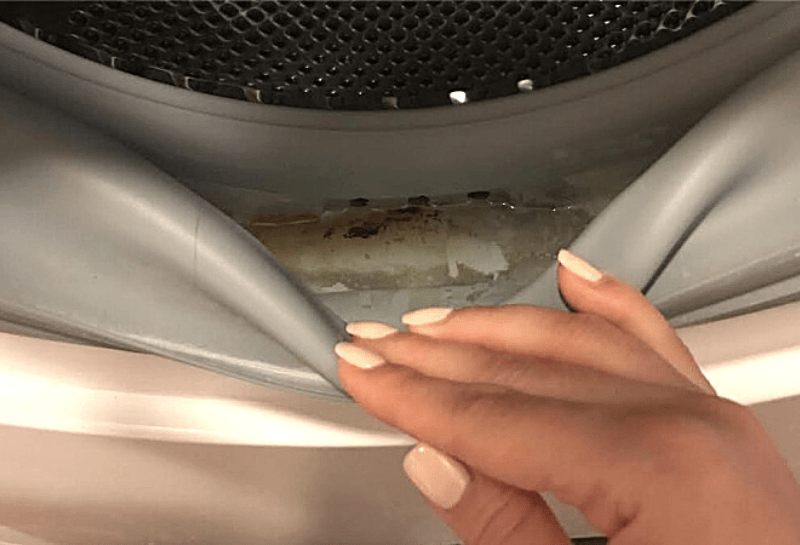
Step 2. Cleaning the cuff (sealing gum), Hurray!
The machine has finished self-cleaning and we can start washing the sealing gum. This dark and humid place tends to accumulate dirt and mold, so it must be especially carefully cleaned. This can be done using any cleaning agent, such as baking soda. We recommend always keeping soda as one of your cleaning supplies. If you see too much mold, which also has a strong unpleasant odor, then use a more powerful remedy, for example, Domestos, Cif, etc. But keep in mind that it is better not to use chlorine-containing products very often, otherwise it could deform the rubber.
What to do: Apply a little of your chosen product to a microfiber cloth or sponge, gently pull the rubber towards you and wipe the metal part of the case.
Also, remember to clean the rubber cuff itself in the same way.
Most of the dirt accumulates in the lower part of the hatch, but its entire circumference should be cleaned.
Be careful not to pull the rubber too hard to avoid damage. Finally, wipe the entire cuff clean with a damp microfiber cloth.
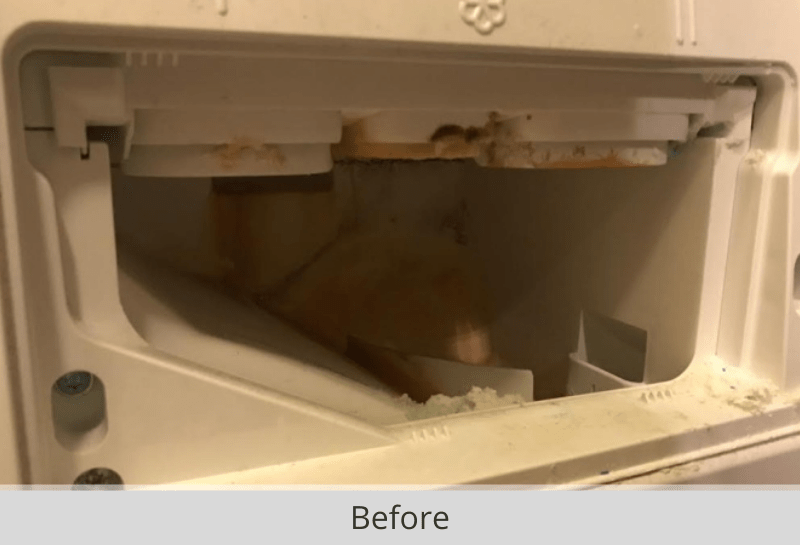
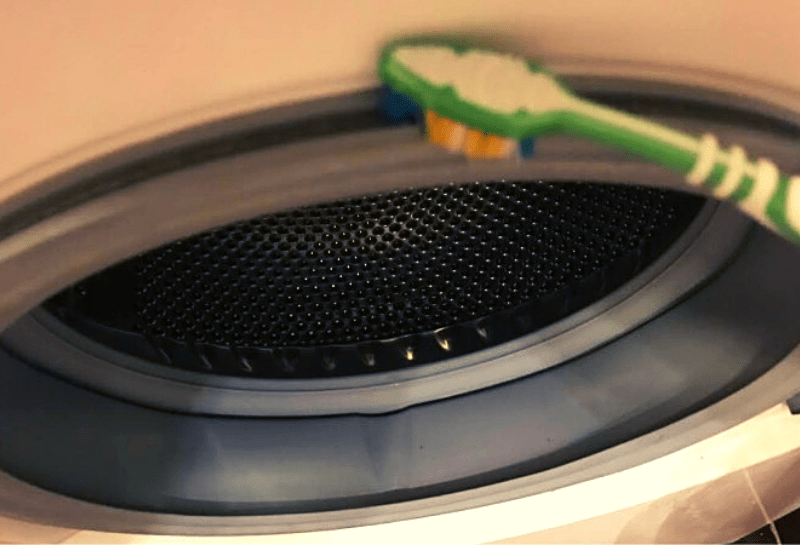
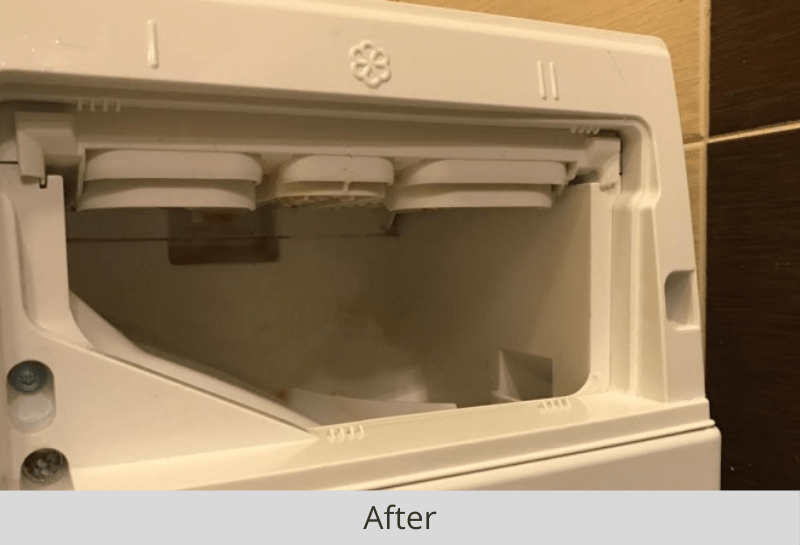
Step 3. Clean the washing machine drawer (container/tray/dispenser)
Find the instruction manual for your machine at home or on the Internet, which tells you how to remove the detergent drawer. The most common way to do this is to pull out the drawer until it stops. If you see that a part is built into its middle compartment (in modern Bosch, Samsung, Veko, etc.) washing machines, then you need to press it and pull it with force, while supporting the container itself.
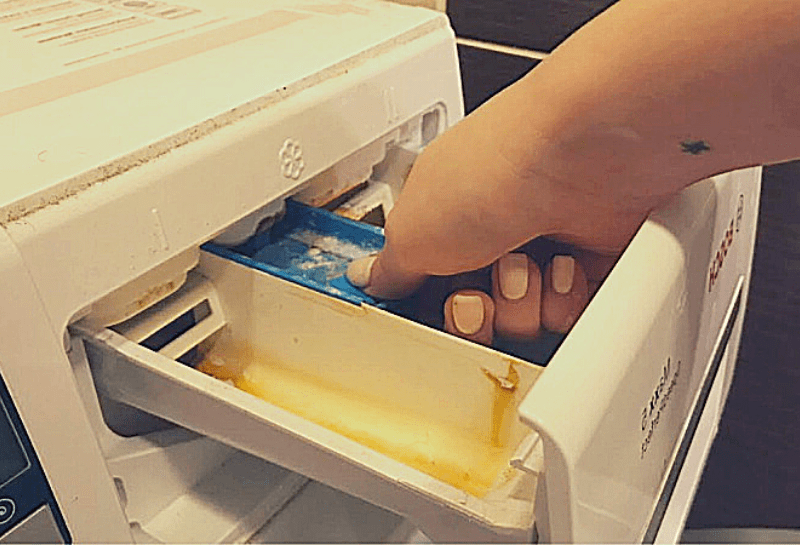
As soon as you take out the drawer, most likely, the following picture will appear in front of you – the remains of the washing powder are accumulated in its compartment. Dispose of these build-ups with any cleaning agent and wipe the compartment clean. Keep in mind that this must be done carefully not to damage the rubber tube.

It is not easy to clean the powder compartment as it has different hard-to-reach places, small protruding parts, and details covered with rust. You can do it even more accurately: sprinkle all the walls of the compartment with a cleaning agent from a spray bottle, leave the plaque to soak for a couple of hours, and only then start manually cleaning. Next, we proceeded to clean the drawer itself, which is usually covered with a rusty coating, residues of powder, and other cleaning additives.
To do this, you can use:
- a mixture of vinegar and soda;
- household cleaning chemicals;
- a mixture of hot water, vinegar, and baking soda.
Cover the container with the agent of your choice and leave it for 30 minutes, or preferably a couple of hours.
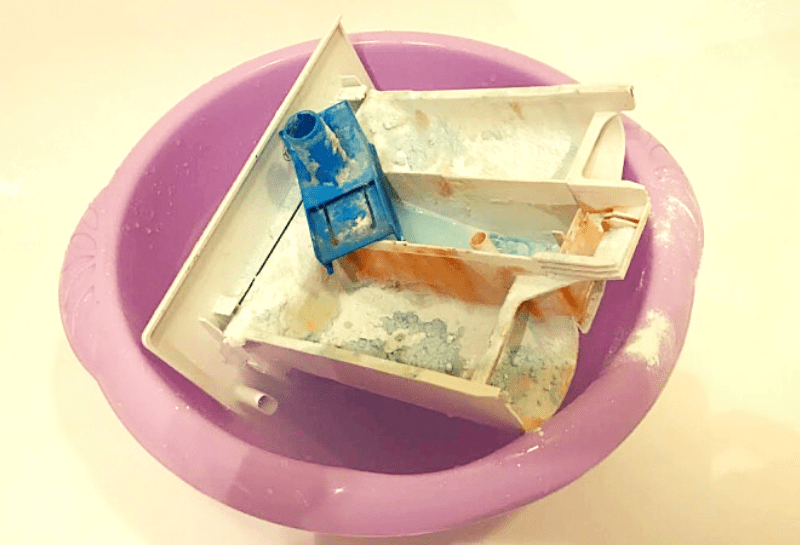
Next, start brushing it with a sponge and a toothbrush (it is especially useful for cleaning hard-to-reach places). Finally, remove any leftover products, wipe the drawer dry, and put it back in (most often you just need to insert it into the compartment and close it). If you have a dishwasher, you can wash the drawer in it. The rust may not go away completely, but it will be much easier to remove it after cleaning in the dishwasher.
Interesting to read:
Summer Refresh: Why Thorough House Cleaning Is So Important During the Hot Period of the Year
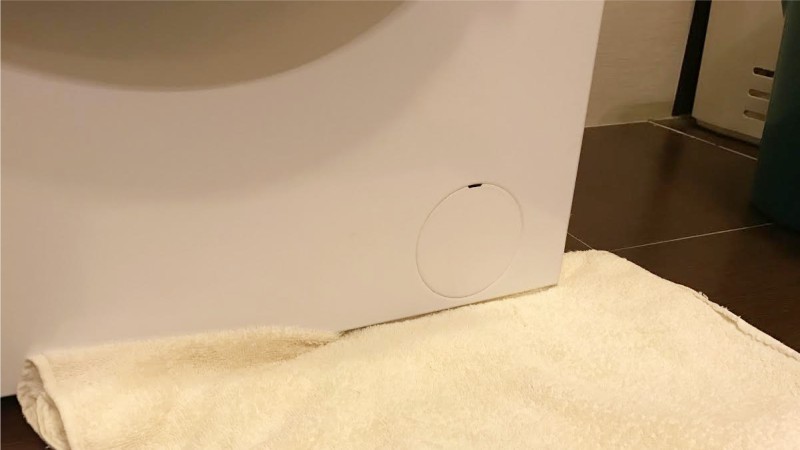
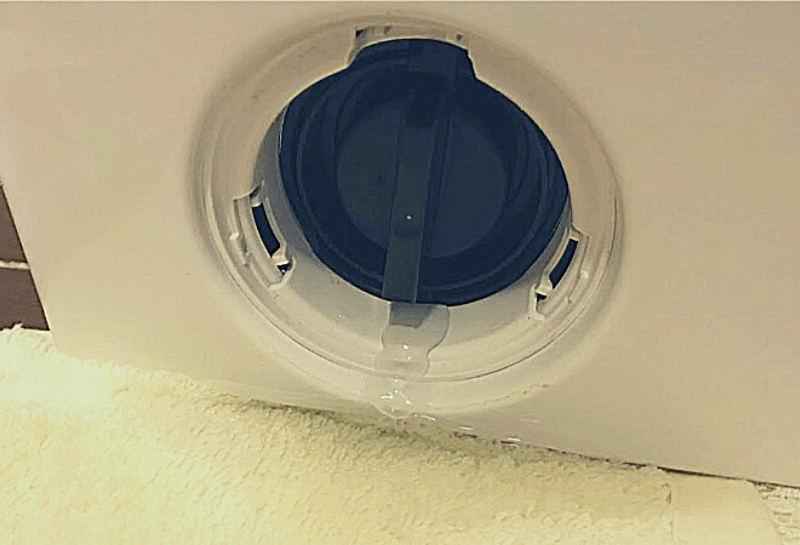
Step 4. Cleaning the washing machine filter (drain pump)
It’s time to clean the drain pump filter. If you run the filter hard, the machine will sooner or later refuse to drain the water, because of which it will go up and may break out. Fortunately, cleaning your washing machine filter is very easy. You will need:
- a suitable container;
- towel or cloth;
- a flat screwdriver or any solid flat tool (if needed).
What to do:
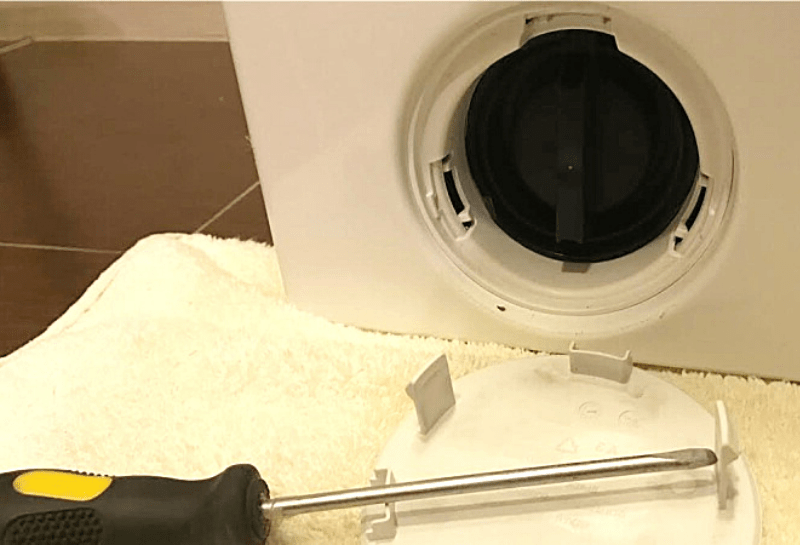
- Open access to the filter, which is usually located at the bottom of the case. In some models of washing machines, the filter is simply covered with a small panel. If this is your case, then you can open it, and if necessary, use a flat screwdriver as shown in one of the following photos.
- So, you see a closed filter. Before unscrewing the lid, lay a towel on the floor and place a container under the drain to collect water.
- Unscrew the lid counterclockwise and remove all accumulated debris and dirt from the hole: it can be coins, hair, wool, toothpicks, and other trifles.
- Wipe the hole, close it, and reinstall the decoration panel.

Step 5. Cleaning the water inlet filter
In addition to the drain pump filter, each washing machine has one more filter – the inlet hose filter. Over time, this filter becomes clogged with rust and sand, then the machine refuses to wash and reports that water intake is not possible. If all the previous procedures need to be carried out regularly, then the filter cleaning could be done less often, for example, once every six months.
You will need:
- an old toothbrush;
- pliers
What to do: Turn off the cold water tap to the washing machine (required!). Turn the machine around to access the rear. On the top right of the case, you will see the inlet hose. Unscrew the hose nut counterclockwise. Look inside the hole, and find a small filter with a mesh. Use pliers to remove it. Clean the filter with a toothbrush. Replace the filter and screw the inlet hose clockwise tightly. Open the cold water by turning the corresponding tap.
When you’re done, you can also wipe down the back of the machine, then unfold it and put it back in its usual place.
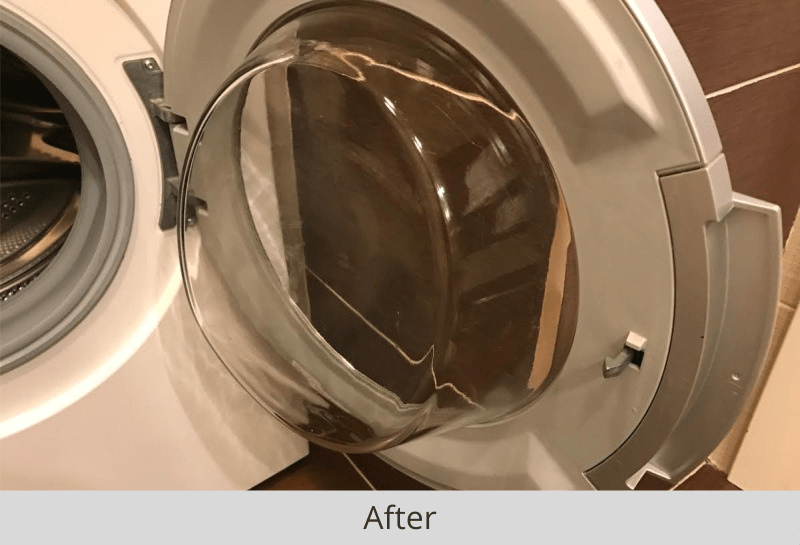
Step 6. Clean the case and door
Well, that’s all, the inside of the machine is clean and ready to go! You just have to bring out the external beauty: wipe the control panel (especially the protruding buttons), wash the door from the inside and out, and wipe the top and side panels.
And a little about maintenance
Use just as much powder, bleach, and conditioner as you really need (see the manufacturer’s instructions). After all, excess detergents do not enhance the result but simply settle and accumulate inside the washing machine. Always remove small items from pockets to avoid clogging the drain filter. Try not to delay your washing if you have already thrown dirty things into the drum. Take out clean things immediately after washing and send them to dry. Try to keep the machine open at all times to prevent mold from building up in the machine. We suggest washing your machine during your monthly cleaning schedule.
Question-answer
Why does the washing machine smell?
There may be several reasons why an unpleasant odor may appear in the washing machine. The three most common are:
- Most often, the smell in the washing machine appears due to the fact that users have a habit of closing the hatch immediately after washing. As a result, due to the remaining moisture, the drum and the sealing gum begin to smell bad under tight conditions and risk becoming moldy. So after every wash, remember to leave the door ajar for a couple of hours to allow the drum to dry.
- Another common cause of unpleasant odors and mold in a washing machine is the accumulation of moisture in the folds of the rubber cuff, as well as small debris. This should be monitored and the cuff should be washed with dishwashing liquid from time to time. If the mold is overgrown, the gum should be replaced with a new one.
- Finally, the third reason is the habit of collecting dirty laundry in the drum. This is convenient, but keep in mind that the combination of high humidity and stale clothing creates favorable conditions for odors, bacteria, and mold growth.
If everything is in order with the drum and the cuff, but there is still a smell, it is worth checking the drawer, the detergent powder supply channel, the drain filter, and the drain hose. All these parts must be clean and free of powder and mildew. The hoses can be checked with a flashlight. Mold usually forms somewhere at the beginning of the hose, so it can be seen and cleaned out with a small brush. Sometimes an unpleasant smell can appear due to the accumulation of scale on the heating element (for example, it can be a burning smell). In this case, clean the washing machine with vinegar or citric acid (see Step 1 in the instructions).
Also read: 17 Important Steps To Do When Moving Into a New Home
About the author: Khrystyna is a cleaning professional with years of experience. She is a founder of White Glove Cleaner agency and her dream is to make New York a cozier place.